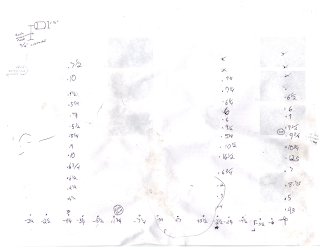
Hey, here are the actual measurements I took of our yard. Now I have to go cut the grass that is growing in our yard. Also, I should go through my stack of papers that has been growing out of control.
Thursday, July 1, 2010
Thursday, June 24, 2010
Some Results
So, here is a 3-D graph of the surveyed yard. Units are 6ft distances.
The graph is ugly, but it is the best I could do with Excel and 1st-order approximations of the points I actually measured. I'll post the measurement sheet tomorrow.
Saturday, June 19, 2010
Surveyed!
Last weekend, I did some invention. I have to draw our yard, and then draw what it should look like with some retaining walls. Then I can submit all of this to the engineer at the concrete block place and he'll tell me what I did wrong. I'll get the results up here another time, complete with error propagation analysis, but I will spare you today.
What invention did I do? To survey land usually requires two people and some specialized equipment. I used a method that required neither. Witness!
As can be seen in the image above, the innovation I introduced to the world was incredible. Here is my secret formula: 1 six-foot martial arts staff, 1 two-foot level, and the handyman's secret weapon, duct tape.
The first step was to place my highly calibrated device -- wait for it -- on the very earth I was surveying. Note that there was a stick pressed into the ground to mark the point I'm measuring.
Next,I had to make sure the instrument was lined up with previous sticks stuck in the ground -- i mean, I had to align it with the existing calibration grid.
Once my scientific apparatus was in place, the next task was to raise the pole until the level read level. I then used an adjustable-length scale (commoners know it as a tape measure) and determined the height of the ground six feet away relative to the current point.
Using proper laboratory method, I then recorded my observations for later analysis. And I got bitten by mosquitoes, and worked on my farmer's tan. All in all, a good afternoon.
What invention did I do? To survey land usually requires two people and some specialized equipment. I used a method that required neither. Witness!
As can be seen in the image above, the innovation I introduced to the world was incredible. Here is my secret formula: 1 six-foot martial arts staff, 1 two-foot level, and the handyman's secret weapon, duct tape.
The first step was to place my highly calibrated device -- wait for it -- on the very earth I was surveying. Note that there was a stick pressed into the ground to mark the point I'm measuring.
Next,
Once my scientific apparatus was in place, the next task was to raise the pole until the level read level. I then used an adjustable-length scale (commoners know it as a tape measure) and determined the height of the ground six feet away relative to the current point.
Using proper laboratory method, I then recorded my observations for later analysis. And I got bitten by mosquitoes, and worked on my farmer's tan. All in all, a good afternoon.
Thursday, June 17, 2010
Thursday, June 10, 2010
Surveying
Having visited with an engineer at the materials place, he instructed me to draw out our yard and include drawings of where the walls should go. I think Back to the Basics has an entry on surveying, so I might take that up. I hope I can finish this afternoon! Then it might be contour maps and integrals for the rest of the evening.
Proverbs 27:23 - Be thou diligent to know the state of thy flocks, [and] look well to thy herds.
Tuesday, June 8, 2010
Retaining Wall Status: Planning
I have lamented our drainage situation on here many times. Recently, I posted about the trench I dug, which is working pretty well. However, we want to terrace the backyard and install drainage that is professional grade. So I'm going to talk to an engineer for a concrete block company about what it'll take to make that happen. In like, twenty minutes.
Thursday, June 3, 2010
It's been a while
Lately, we've been pretty busy. Let it be known, however, that we did put in new light fixtures for the bathroom and the kitchen, the which light fixtures are very pretty. Also, we have a threshold that Annie has been staining this week, which will bridge the gap between the kitchen and the living room. I'm about to go home and work on the lawn!
Wednesday, May 26, 2010
Windowsills
Annie has been painting window sills lately, as well as the rest of the window frames. I know what you're asking in your head but are too polite to post as a comment: Why didn't they paint the window sills when they painted pretty much everything else in their house? There's no need to overcome your bashful tendencies, because I will be forthright. We couldn't really figure them out. I mean, I was in a hurry getting all of the trim in, and the window sills were never removed, and I didn't know how they were mounted or what their shape was, and I didn't take the time to find out what a window sill really was.
Here's some before-and-after for ya!
TTFN
Here's some before-and-after for ya!
TTFN
Monday, May 24, 2010
I dug a ditch
Saturday was largely invested in digging a ditch behind our house. It is modest, but it took the better part of a morning, and it is at least some temporary attempt to alleviate the millions of gallons of water that assault our home every rainstorm.
The main trick is the fall rate. You want at least a quarter of an inch every two feet (if memory serves) and I had to construct a level adapter by taking a quarter-inch bit of window trim and duct-taping it to the end of the two-foot level. Since we had some leftover frames from discarded cabinet doors, I used one of these to keep the level above ground so I could actually read it (and yes, I did make sure the frame was square before I used it for this purpose).
It was rough. I pulled something in my back (Annie suggested I push it back) and I got a bit of the prickly heat, but at least I'm safe in knowing that a couple of hours after digging the trench, some moles demolished one end of it.
I can't wait until it rains, though.
Friday, May 21, 2010
Trim in the Kitchen!
This week, we managed to purchase some trim, paint it, and install most of it. The baseboards went first, of course.
Then there was some hiding behind the refrigerator...
Followed by some window trim...
We are quite pleased with how the trim is playing out. We still have to install a threshold, hide the nail holes, and caulk, but it is looking pretty good. Also, I'm still really happy with the knobs:
Then there was some hiding behind the refrigerator...
Followed by some window trim...
We are quite pleased with how the trim is playing out. We still have to install a threshold, hide the nail holes, and caulk, but it is looking pretty good. Also, I'm still really happy with the knobs:
Subscribe to:
Posts (Atom)